
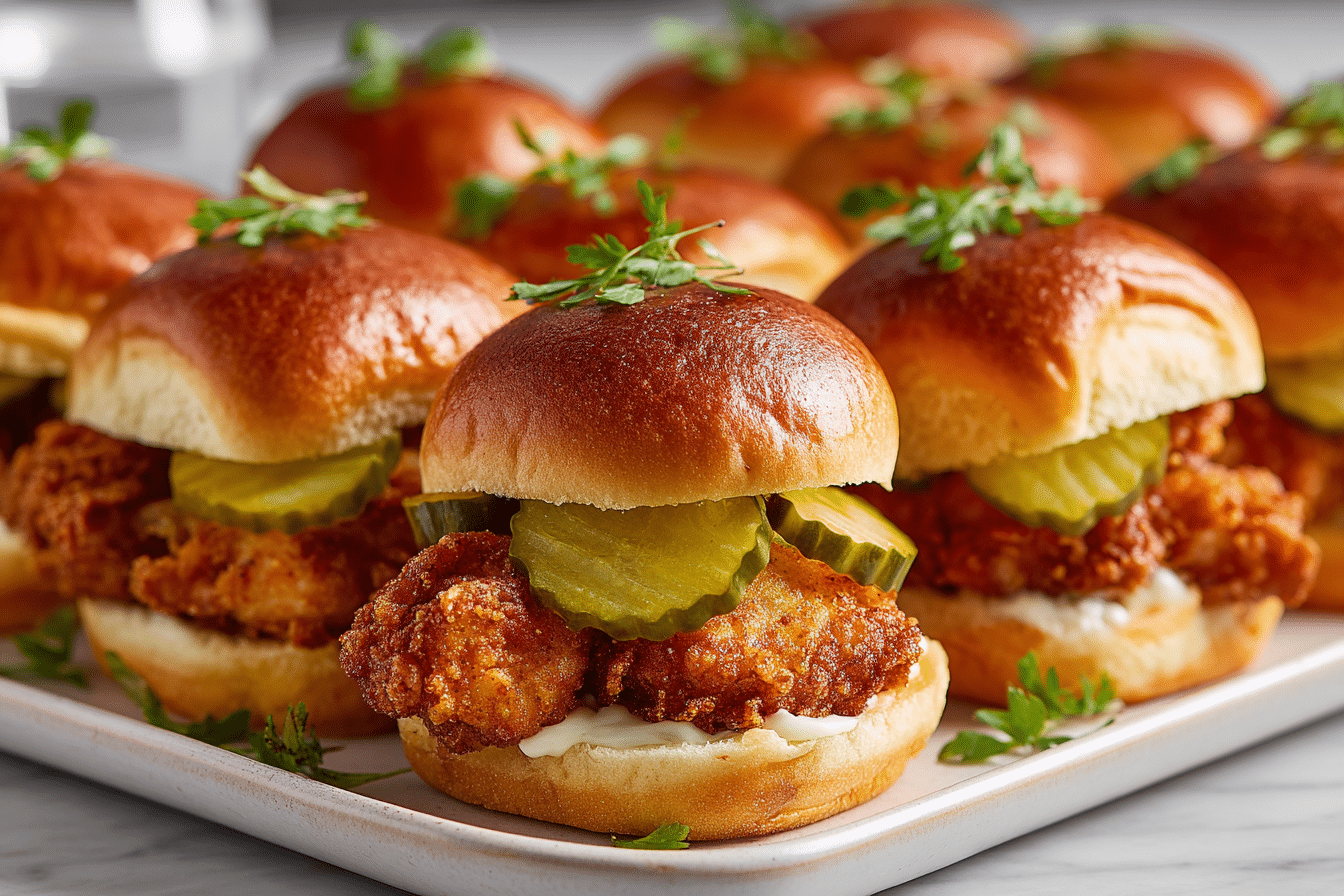
Few things hit the spot like a crispy chicken slider, and when it’s soaked in tangy pickle brine first? You’ve got a game-changer. These Pickle-Brined Crispy Chicken Slider Bites are juicy, crunchy, and packed with flavor, making them the perfect snack for any occasion—from backyard BBQs to casual weeknight dinners.
Marinating the chicken in pickle juice doesn’t just give it a bold kick; it helps break down the meat, locking in moisture and tenderness. Once dredged in a seasoned flour blend and fried until golden brown, each bite becomes a mini flavor bomb—tangy, crispy, and deeply satisfying. Tucked into soft slider buns with your favorite toppings, these bites are sure to be devoured in seconds.
They’re small in size, but don’t be fooled—they bring big flavor to the table. This recipe takes a classic comfort food and gives it a tangy twist that’s hard to forget.
Ingredients Breakdown

Chicken (Thighs or Breasts)
Boneless thighs are a top pick for their rich flavor and tender texture, but chicken breasts work too if they’re sliced thin. The key is cutting them into slider-sized pieces, which helps them cook quickly and evenly.
Dill Pickle Brine
This is where the flavor journey begins. The salty, vinegary liquid from a jar of dill pickles does double duty—infusing the chicken with punchy flavor and making it incredibly tender. Sweet pickle juice can be used for a milder, slightly sugary taste.
Buttermilk
This creamy ingredient teams up with the pickle brine to enhance the tang and help the flour mixture stick. No buttermilk? Mix whole milk with a bit of lemon juice or vinegar as a quick alternative.
Flour + Cornstarch
All-purpose flour gives the chicken a classic fried crust, while a touch of cornstarch lightens the batter and helps keep it crisp longer.
Seasonings
A bold blend of spices—think garlic powder, paprika, cayenne, salt, and pepper—adds warmth and a hint of heat. Feel free to adjust spice levels to your preference.
Slider Rolls
Soft, slightly sweet buns like brioche or Hawaiian rolls complement the crispy chicken beautifully. Potato rolls also work well for a more neutral base.
Toppings
From crunchy slaw to spicy mayo or extra pickle slices, there’s no wrong way to top these. Customize each bite to suit your crowd or mood.
How to Make Them
-
Soak the Chicken
Slice your chicken into bite-sized portions that fit neatly inside slider buns. In a bowl, mix the pickle juice and buttermilk. Add the chicken and refrigerate for at least four hours—overnight is even better. -
Get the Breading Ready
In a shallow dish, stir together flour, cornstarch, and all the seasonings. This dry mix is what gives the chicken its crispy coating, so make sure everything is well blended. -
Coat the Chicken
Take the chicken out of the brine and let the extra liquid drip off. Toss each piece in the flour mixture, pressing gently to coat every side. Set them on a tray and let them sit for 10–15 minutes—this resting time helps the coating adhere during frying. -
Heat the Oil
Fill a large skillet or Dutch oven with about 1½ inches of oil. Heat it over medium-high heat until the temperature reaches 350°F. A thermometer is your friend here—too hot and the crust burns, too cool and it gets soggy. -
Fry to Perfection
Fry the chicken in small batches to avoid crowding the pan. Cook each piece for 3–4 minutes per side until deeply golden and crisp. The internal temperature should read 165°F. -
Drain and Rest
Transfer the chicken to a wire rack set over a baking sheet. This lets excess oil drip away and keeps the coating crunchy. Sprinkle with a little salt while the pieces are still hot. -
Build the Sliders
Lightly toast the slider buns if you like. Add one crispy chicken bite to each, followed by your choice of toppings—pickles, slaw, sauces, or all of the above. Serve while hot.
Tips, Tweaks & Flavor Swaps
Helpful Hints:
-
Letting the coated chicken rest before frying helps prevent the breading from sliding off in the oil.
-
Don’t rush frying—crowding the pan lowers the temperature and leads to greasy chicken.
-
Keep batches warm in a low oven while you finish the rest.
Make It Your Own:
-
Crave heat? Add a splash of hot sauce to the brine or brush fried pieces with chili oil.
-
For a smoky edge, stir smoked paprika or chipotle powder into the flour.
-
Nashville-style lovers can drizzle hot honey or cayenne oil on the finished sliders.
Smart Substitutions:
-
No pickle juice? Make a brine with vinegar, garlic, and salt as a stand-in.
-
For dairy-free buttermilk, combine non-dairy milk with lemon juice or apple cider vinegar.
-
Gluten-free? Use a 1:1 gluten-free flour mix and pair with gluten-free slider buns.
When to Serve & What to Pair With
Pickle-Brined Chicken Sliders are incredibly versatile and ideal for gatherings. They’re the kind of bite-sized snack that disappears fast at birthday parties, tailgates, or potlucks. Make a platter with a variety of toppings and dipping sauces to please every guest.
Pair them with classic sides like crispy fries, tater tots, or a crunchy pickle spear. A bright salad or chilled cucumber slaw can cut the richness and refresh your palate. As for drinks, go with a cold beer, lemonade, or sparkling water with lime to round out the meal.
They also work well as a dinner main—just serve a few sliders per person with hearty sides for a satisfying meal.
Nutrition and Wellness Insights
While undeniably indulgent, there are a few ways to make these sliders a bit more balanced. Choosing chicken breast instead of thighs can cut down on fat, and using an air fryer or baking instead of deep-frying makes them lighter without compromising too much on texture.
Pickle brine itself is a low-calorie ingredient, offering flavor without added sugars or fats. You can also load up the sliders with fresh veggies like shredded lettuce or slaw for crunch and extra nutrients.
Keeping portions in check is key. Since they’re slider-sized, it’s easy to enjoy a few without overdoing it. Paired with fresh, fiber-rich sides, these can be part of a well-rounded meal.
Frequently Asked Questions
1. Can I use chicken tenders instead of thighs or breasts?
Yes—chicken tenders are a convenient choice and require very little trimming. They’re also the perfect size for sliders and cook quickly.
2. How long does the chicken need to soak in the brine?
A minimum of 4 hours will do, but letting it sit overnight enhances the flavor and tenderness. Just don’t exceed 24 hours, or the texture can become overly soft.
3. Can these be baked or air fried instead of deep-fried?
Definitely. For baking, coat the chicken well and bake at 425°F for around 20 minutes, flipping once. In the air fryer, 390°F for 12–14 minutes usually gets the job done—just don’t forget a light spray of oil.
4. What’s the best method to keep them crispy?
Drain the fried chicken on a wire rack instead of paper towels, which can trap steam. Keeping them warm in a low oven also helps preserve crispness while you finish the rest.
5. Can I make these ahead and freeze them?
Yes, but only after frying. Let them cool completely, then freeze in a single layer before storing in a bag or container. Reheat in a 375°F oven for 12–15 minutes to restore that crunch.
6. What are some great sauces to serve with them?
Spicy mayo, garlic aioli, ranch dressing, or even a sweet-and-spicy chili sauce all pair wonderfully. You can even serve several options to let guests build their own perfect slider.
7. How do I make these gluten-free?
Use a gluten-free all-purpose flour blend for the coating and swap in gluten-free buns. Be sure your condiments and pickle brine are also certified gluten-free.
Tangy, juicy chicken pieces soaked in pickle brine, breaded and fried to golden crisp perfection, then served on soft slider buns with toppings of your choice.
- Prep Time: 15 minutes
- Cook Time: 15 minutes
- Total Time: 30 minutes
- Yield: 4 servings 1x
Ingredients
1½ lbs boneless chicken thighs or breasts, cut into slider-size pieces
1 cup dill pickle juice
1 cup buttermilk
1½ cups all-purpose flour
½ cup cornstarch
1 tsp garlic powder
1 tsp paprika
½ tsp cayenne pepper
1 tsp salt
½ tsp black pepper
Vegetable oil, for frying
12 slider buns
Pickles, slaw, and condiments, for serving
Instructions
-
Mix pickle juice and buttermilk in a bowl. Add chicken and refrigerate 4–24 hours.
-
In another dish, mix flour, cornstarch, and spices.
-
Remove chicken from brine and coat in flour mixture. Let sit 10–15 minutes.
-
Heat oil in a deep skillet to 350°F.
-
Fry chicken in small batches, 3–4 minutes per side.
-
Drain on a wire rack and season with salt.
-
Assemble on slider buns with your chosen toppings. Serve hot.