
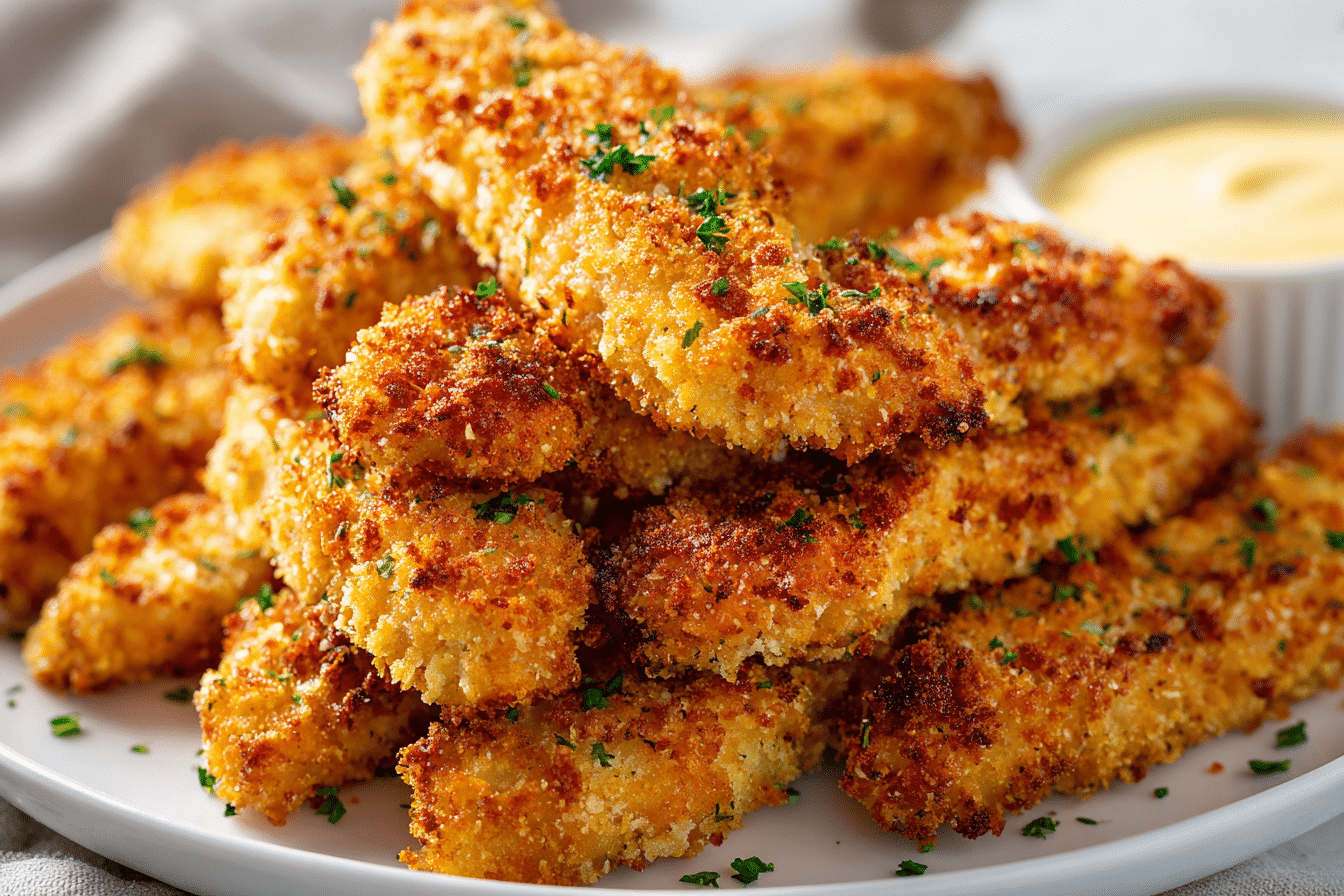
When it comes to comfort food, few things rival the simple joy of chicken tenders—especially when they’re crispy, flavorful, and baked to golden perfection. These Golden Baked Chicken Tenders capture everything you love about the fried version, but they’re made in the oven with no greasy mess.
This recipe is your answer to weeknight cravings, picky eaters, or anytime you want a satisfying meal that’s quick, wholesome, and full of flavor. A seasoned panko-Parmesan coating ensures each bite is crunchy and rich, while the chicken remains tender and juicy on the inside. There’s no deep frying, no shortcuts, just a simple, reliable method that delivers every time.
You won’t miss the fryer once you try these—you’ll be too busy going back for seconds.
Ingredients You’ll Need

Chicken Tenders or Breast Strips
Boneless, skinless chicken tenders are perfect for convenience, but chicken breasts sliced into strips work just as well. Go for fresh chicken for the best taste and texture.
Buttermilk (Optional but Recommended)
A short soak in buttermilk makes the chicken even more tender and flavorful. It adds a subtle tang and helps the coating stick. If needed, make a quick substitute using 1 cup of milk and 1 tablespoon of lemon juice or vinegar.
Panko Breadcrumbs
These extra-crispy Japanese-style breadcrumbs are the key to the tender’s crunchy exterior. Panko stays light and flaky during baking, delivering that signature texture without frying.
Parmesan Cheese
Freshly grated Parmesan melts slightly as it bakes, adding depth and a salty bite to the crust. It also helps create a lovely golden color.
Flour
Flour acts as the base layer, helping the egg mixture grab onto the chicken. This step is essential for ensuring the coating stays intact.
Eggs
Beaten eggs work as a binder to hold the breadcrumbs in place. They help the coating stick well and create a barrier that locks in moisture.
Seasonings
A blend of garlic powder, paprika, onion powder, salt, and pepper brings flavor into every layer. Adjust quantities to suit your taste or spice preference.
Oil or Cooking Spray
A light coating of oil ensures a crispy finish without frying. Use olive oil spray or a small drizzle of your preferred high-heat oil.
How to Make Baked Chicken Tenders
Step 1: Marinate the Chicken (Optional)
Place the chicken strips in a bowl with buttermilk. Let them soak for 30 minutes or up to overnight in the refrigerator. This step helps the chicken stay moist and enhances its flavor.
Step 2: Set Up Your Dredging Station
You’ll need three shallow dishes:
-
One with seasoned flour
-
One with whisked eggs
-
One with the breadcrumb mixture, including panko, Parmesan, and spices
Step 3: Prep the Baking Tray
Heat your oven to 425°F (220°C). Line a baking sheet with parchment or foil, then place a wire rack on top. This setup promotes even crisping and prevents soggy bottoms.
Step 4: Coat the Chicken
Take each piece of chicken and follow this sequence: dredge lightly in flour, dip into the egg, then coat fully with the breadcrumb mix. Press the coating on gently so it adheres well.
Step 5: Arrange and Add Oil
Lay the breaded chicken pieces on the wire rack. Give them a quick spray or drizzle of oil to encourage a crispy, golden crust during baking.
Step 6: Bake
Bake for 18–22 minutes, flipping the tenders about halfway through to ensure both sides crisp evenly. The chicken should be fully cooked (internal temp of 165°F) and golden brown.
Step 7: Rest Before Serving
Let the tenders rest for 5 minutes after baking. This helps preserve the crunchy coating and allows juices to redistribute.
Helpful Tips, Flavor Options & Adjustments
Cooking Tips:
-
Don’t skip the wire rack—it helps air circulate, so the bottoms get crispy too.
-
Give each tender enough space on the tray; crowding can lead to uneven browning.
-
Toast the panko in a dry skillet beforehand for an even deeper crunch.
Flavor Variations:
-
Mix in ranch seasoning, Cajun spice, or dried Italian herbs for extra flavor.
-
Replace Parmesan with sharp cheddar or smoked gouda for a unique twist.
-
Add cayenne or chili flakes if you like heat.
Ingredient Substitutions:
-
Use gluten-free flour and panko for a GF version.
-
Omit Parmesan and use dairy-free milk (with lemon juice) for a dairy-free alternative.
-
Swap eggs with Greek yogurt or Dijon mustard mixed with water for an egg-free binder.
Serving Suggestions
Baked chicken tenders pair well with just about anything. Serve them as a main dish, snack, or appetizer—hot from the oven or even room temperature.
Great ways to serve:
-
With dipping sauces like honey mustard, ranch, BBQ, or garlic aioli
-
Inside wraps or sandwiches with lettuce, tomato, and your favorite spread
-
Over mixed greens for a crisp, protein-packed salad
-
Alongside roasted vegetables, sweet potato fries, or a grain bowl
They’re perfect for busy weeknights, casual gatherings, or meal prepping lunches for the week ahead.
Nutrition and Wellness Notes
These baked tenders are a lighter take on a comfort classic. Baking instead of frying cuts down on oil and calories while preserving the crispiness. Using chicken breast adds lean protein, and the recipe uses minimal processed ingredients.
Want a lower-fat option? Try using egg whites and reduce the amount of cheese. You can also cut back on the breadcrumb coating slightly for a lower-carb variation.
Because you control the ingredients, these tenders can be adapted for different dietary needs while still offering full flavor and satisfying texture.
Common Questions
1. Can I prepare them ahead of time?
Yes, you can assemble the breaded tenders and refrigerate them up to 12 hours before baking. Let them sit at room temperature for 10 minutes before placing them in the oven.
2. Are they freezer-friendly?
They freeze well after baking. Cool completely, freeze in a single layer, then transfer to a freezer-safe container. Reheat in a 400°F oven for 15–20 minutes until hot and crisp.
3. Can I cook these in the air fryer?
Absolutely. Air fry at 400°F for 10–12 minutes, turning once. Use a light spray of oil to help with browning.
4. What sauces work best?
These tenders pair wonderfully with classic sauces like ranch, BBQ, or ketchup. For something more adventurous, try chipotle mayo, tzatziki, or a tangy buffalo dip.
5. Can I make them without eggs?
Yes. You can use a blend of plain Greek yogurt and water or even Dijon mustard with water as a binder instead of eggs.
6. Why is my breading falling off?
This usually happens when the chicken is too wet or the breading isn’t pressed on firmly. Pat the chicken dry, coat lightly, and avoid flipping too early while baking.
7. Can I use regular breadcrumbs?
Regular breadcrumbs work, but the texture will be denser and less airy. Toasting them first can help add some crunch, though they won’t be as crispy as panko.
These Golden Baked Chicken Tenders deliver crisp texture and juicy flavor—without deep frying. Coated in Parmesan and panko, they’re oven-baked and perfect for dipping, wrapping, or serving with your favorite sides.
- Prep Time: 15 minutes
- Cook Time: 15 minutes
- Total Time: 30 minutes
- Yield: 4 servings 1x
Ingredients
1 ½ lbs chicken tenders or sliced chicken breasts
1 cup buttermilk
1 cup panko breadcrumbs
½ cup grated Parmesan cheese
½ cup all-purpose flour
2 large eggs
1 tsp garlic powder
1 tsp paprika
½ tsp onion powder
½ tsp salt
¼ tsp black pepper
Cooking spray or olive oil drizzle
Instructions
-
Soak chicken in buttermilk for at least 30 minutes.
-
Preheat oven to 425°F and line a baking sheet with foil and a wire rack.
-
Set up bowls for flour, beaten eggs, and a breadcrumb mix with Parmesan and spices.
-
Dredge chicken in flour, dip in eggs, and coat with breadcrumbs.
-
Place on the rack, spray with oil, and bake for 18–22 minutes, flipping once.
-
Rest 5 minutes before serving.