
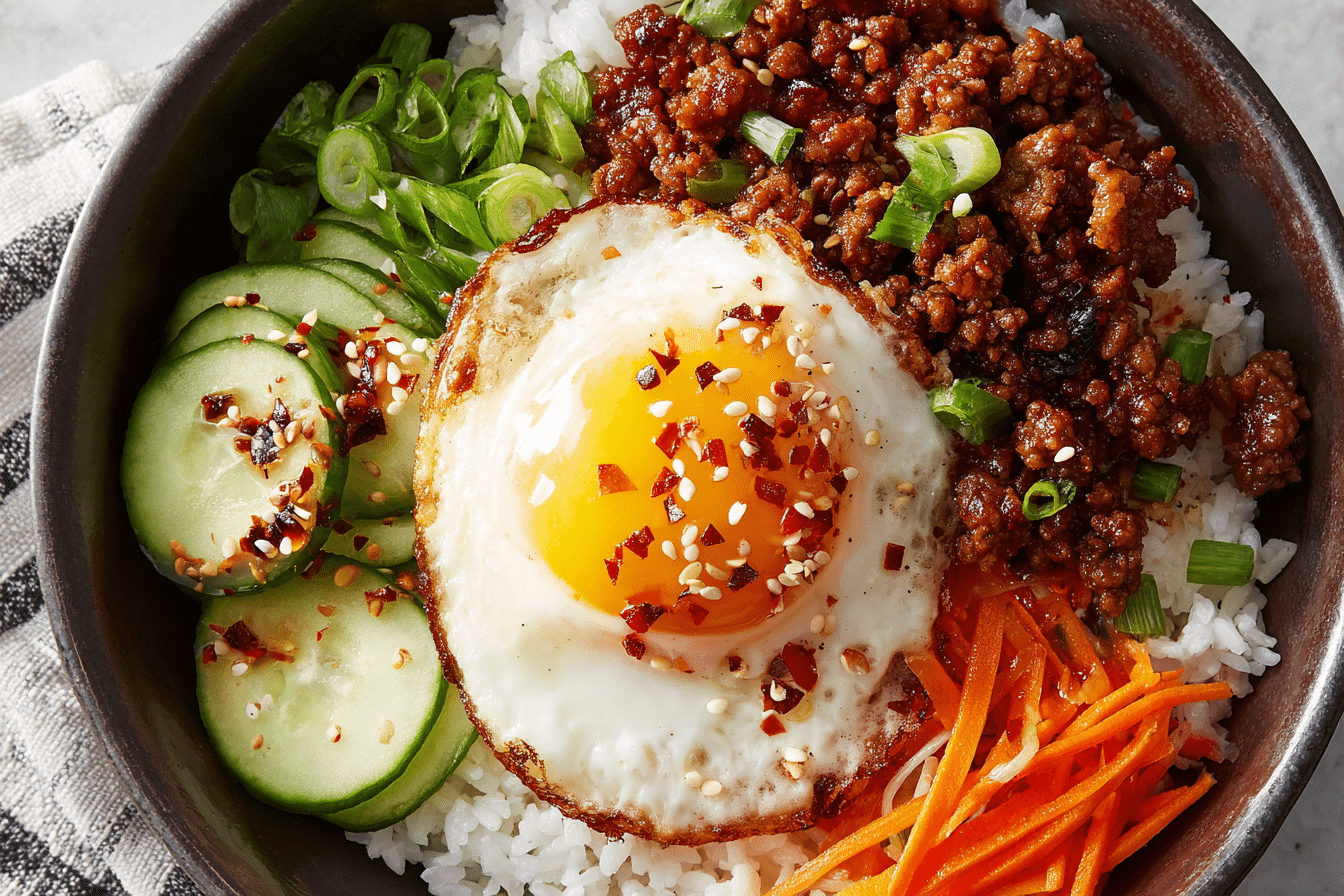
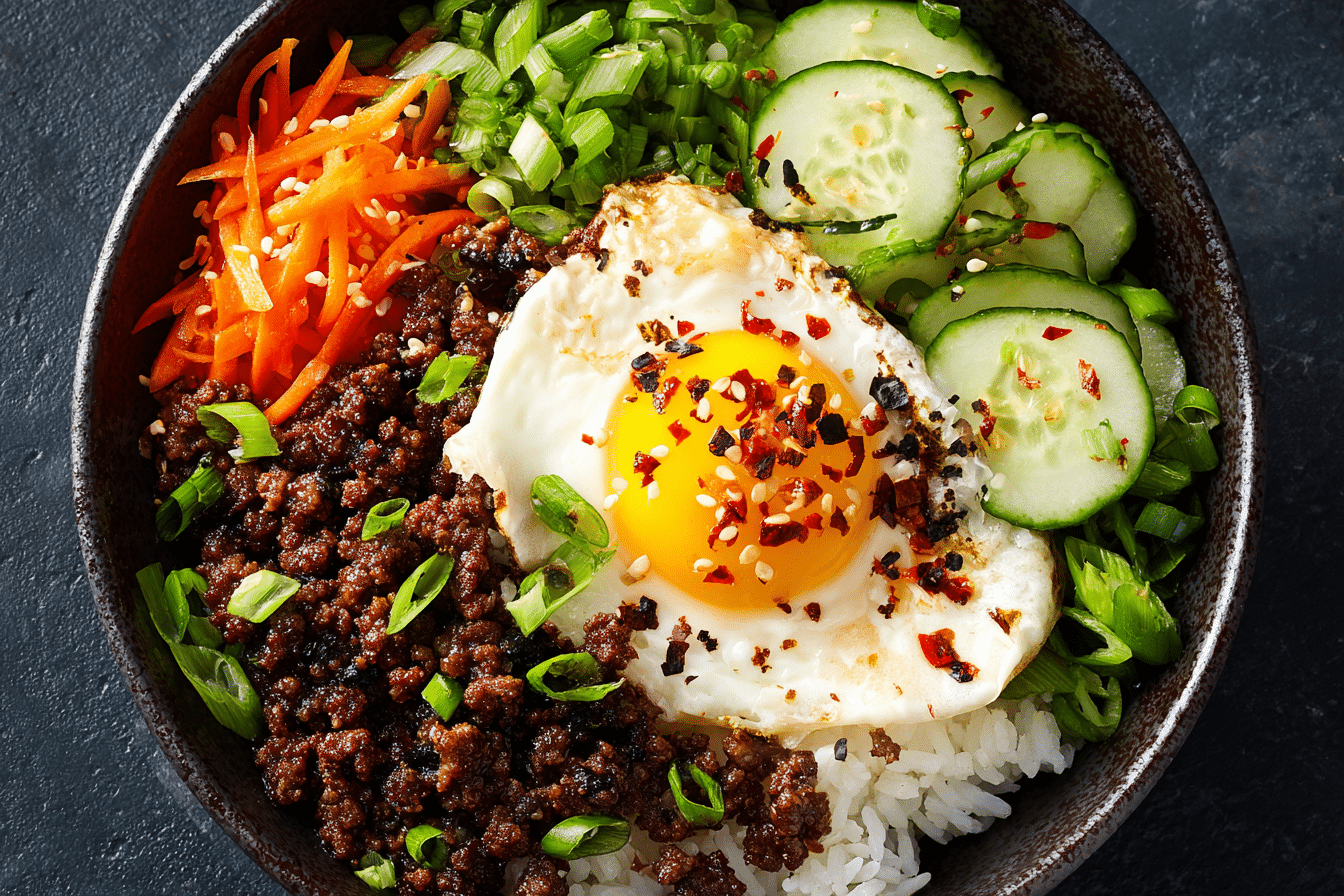
When dinner needs to be fast, flavorful, and satisfying, this Quick & Easy Korean Ground Beef Bowl delivers every time. Inspired by the bold, umami-rich flavors of Korean bulgogi, this simplified dish swaps out sliced beef for ground meat without sacrificing any of the signature sweet, savory, and slightly spicy notes.
With a short ingredient list and a cooking time under 20 minutes, it’s perfect for busy weeknights, budget-friendly meal prep, or those moments when you’re craving something bold and comforting with minimal effort. Serve it over hot rice, tuck it into lettuce wraps, or top it with a runny fried egg for a complete, crave-worthy bowl.
Ingredients Overview
This dish proves that simple pantry staples can come together for bold, restaurant-quality flavor. Here’s a breakdown of what you need and why it works.
-
Ground Beef: Choose 85/15 for the right balance of richness and minimal grease. Leaner options work but may need a splash of oil.
-
Garlic: Minced fresh garlic infuses the beef with classic Korean depth and aroma. Don’t skimp.
-
Ginger: Freshly grated ginger brings warmth and that authentic zing. Ground ginger works in a pinch.
-
Soy Sauce: This provides the salty umami backbone of the sauce. Use low-sodium if preferred.
-
Brown Sugar: A touch of sweetness mimics bulgogi flavor. You can also use honey or coconut sugar.
-
Sesame Oil: Nutty and aromatic, it’s added at the end for full flavor impact.
-
Crushed Red Pepper Flakes (Optional): Adds gentle heat — go light or omit for milder palates.
-
Green Onions: Stirred in at the end for freshness and color.
-
Cooked White Rice: Jasmine or short-grain rice works beautifully to soak up all the saucy beef.
Optional Add-Ons
-
Shredded carrots or zucchini sautéed into the meat
-
Kimchi on the side for tang and spice
-
Fried egg on top for richness
-
Toasted sesame seeds for crunch
Ingredient Substitutions
-
Ground turkey or chicken for a lighter version
-
Tamari or coconut aminos for gluten-free
-
Maple syrup or honey instead of brown sugar
-
Cauliflower rice for a low-carb option
 Step-by-Step Instructions
This recipe is all about quick, intuitive cooking. Everything comes together in one pan, making it both fast and mess-free.
-
Prepare the Rice: If you haven’t already, cook the rice and keep it warm. This dish moves quickly, so having your base ready helps everything flow.
-
Brown the Beef: In a large skillet over medium-high heat, add a small drizzle of oil if your meat is lean. Add the ground beef and cook until browned, breaking it up with a spoon as it cooks — about 5–6 minutes.
-
Add Garlic & Ginger: Once the beef is mostly cooked, stir in the minced garlic and grated ginger. Cook for 1–2 minutes until fragrant, stirring constantly to prevent burning.
-
Make the Sauce: In a small bowl, whisk together soy sauce, brown sugar, and red pepper flakes. Pour over the beef and stir to coat completely.
-
Simmer: Let the beef simmer in the sauce for 2–3 minutes until slightly thickened and glossy. If it reduces too quickly, add a splash of water or broth.
-
Finish with Sesame Oil: Turn off the heat and stir in the sesame oil and chopped green onions.
-
Serve: Spoon over hot rice and garnish with sesame seeds, more green onions, or a fried egg.
Optional Step – Veggie Boost
To make it a one-bowl meal, add shredded carrots, diced bell peppers, or thin zucchini slices with the garlic and ginger. Let them cook down slightly before adding the sauce.
Tips, Variations & Substitutions
This is one of those dishes that welcomes creativity while still being foolproof. Here’s how to make it your own.
Cooking Tips
-
Don’t overcook the sauce: It should lightly coat the beef, not evaporate completely.
-
Prep your aromatics ahead of time — the dish cooks fast.
-
Double the sauce if you like extra juice for your rice.
Flavor Variations
-
Spicy Gochujang Twist: Stir in 1 tbsp gochujang with the sauce for deeper spice and fermented flavor.
-
Sweet & Tangy: Add a teaspoon of rice vinegar or lime juice to the sauce for a touch of acid.
-
Korean BBQ-Inspired: Add a splash of mirin or pear juice for authentic sweetness.
Dietary Substitutions
-
Low-carb: Serve over cauliflower rice or shredded cabbage.
-
Gluten-free: Use tamari or coconut aminos.
-
Vegan: Use plant-based ground meat and maple syrup or agave in the sauce.
Serving Ideas & Occasions
This Korean ground beef bowl is as flexible as it is delicious — serve it any time, any way.
-
Quick Weeknight Dinner: 20 minutes start to finish — perfect for busy evenings.
-
Meal Prep: Divide into containers with rice and veggies for a grab-and-go lunch all week.
-
Kids’ Favorite: Mild, sweet-savory flavors are always a hit.
-
Light Lunch: Serve in lettuce cups with pickled radish and cucumber.
Pair it with a side of miso soup, steamed broccoli, or kimchi for a rounded meal. Add a runny egg or sprinkle of chili oil for a more indulgent version.
Nutritional & Health Notes
This dish is balanced, rich in protein, and easy to adjust for a variety of diets.
-
Protein-rich: A hearty dose of ground beef makes it satisfying and filling.
-
Portion-controlled: Served over rice or veggies, it keeps you full without feeling heavy.
-
Adjustable macros: Use lean meat and cut back on sugar for a lighter version.
-
Meal prep-friendly: Keeps well in the fridge for up to 4 days, making it ideal for busy weeks.
Make it part of a balanced plate with veggies and whole grains, or go light with lettuce cups and a vinegar-based slaw.
FAQs
Q1: Can I use frozen ground beef?
A1: Yes, but be sure to thaw it completely before cooking for even browning and texture.
Q2: Is this dish spicy?
A2: It’s mildly spicy from red pepper flakes, but you can easily adjust the heat level or omit the spice entirely.
Q3: Can I use ground turkey or chicken instead?
A3: Absolutely. Just add a touch of oil to the skillet to prevent drying out, and consider increasing the seasoning slightly.
Q4: How do I store leftovers?
A4: Cool completely and store in an airtight container in the fridge for up to 4 days. Reheat gently in the microwave or a skillet.
Q5: Can I freeze this dish?
A5: Yes. Freeze the cooked beef mixture (without rice) for up to 2 months. Thaw overnight and reheat before serving.
Q6: What vegetables go best with this bowl?
A6: Try sautéed spinach, shredded carrots, zucchini, bell peppers, or steamed broccoli for color and nutrition.
Q7: How do I make this lower in sugar?
A7: Use less brown sugar or swap it for a sugar-free sweetener like monk fruit or erythritol. You can also balance the flavor with more garlic or sesame oil.
Quick & Easy Korean Ground Beef Bowl – A 20-Minute Weeknight Favorite
A fast and flavorful Korean-inspired ground beef bowl with sweet, savory, and spicy notes. Ready in 20 minutes and perfect for weeknight meals or meal prep.
- Prep Time: 5 minutes
- Cook Time: 15 minutes
- Total Time: 20 minutes
- Yield: 4 servings 1x
Ingredients
-
1 lb ground beef (85/15 preferred)
-
3 garlic cloves, minced
-
1 tbsp fresh grated ginger
-
¼ cup soy sauce
-
2 tbsp brown sugar
-
½ tsp crushed red pepper flakes (optional)
-
1 tsp sesame oil
-
2 green onions, chopped
-
2 cups cooked jasmine rice
-
Optional: sesame seeds, fried egg, sautéed vegetables
Instructions
-
Heat a skillet over medium-high heat. Brown the beef until no longer pink, about 5–6 minutes.
-
Add garlic and ginger; cook 1–2 minutes until fragrant.
-
In a small bowl, mix soy sauce, brown sugar, and red pepper flakes. Pour over beef.
-
Simmer for 2–3 minutes until slightly thickened.
-
Remove from heat and stir in sesame oil and green onions.
-
Serve over warm rice. Garnish with sesame seeds or a fried egg if desired.
Notes
-
Use tamari for gluten-free.
-
Double the sauce if you love extra flavor.
-
Great for lettuce wraps or meal prep containers.5 minutes